Understanding the British Climate and Its Challenges
If you’ve ever spent a good few seasons gardening in the UK, you’ll know that our weather is nothing if not unpredictable. The British climate is a true mixed bag – one minute, you’re basking in mild sunshine, the next you’re caught in a sudden downpour or bracing against gusty winds. For those of us considering or already running polytunnels, this unique blend of frequent rain, persistent wind, and wild temperature swings presents its own set of challenges.
The heavy rainfall can lead to water pooling around your tunnel’s base or even dripping through any weak points. Meanwhile, strong winds, which are especially common in exposed rural areas and along our coasts, can test the mettle of any structure not properly anchored or reinforced. And let’s not forget the temperature fluctuations – those days when it feels like all four seasons have taken a turn before tea time. These conditions can stress materials, loosen fastenings, and shorten the lifespan of even a well-built polytunnel.
It’s no wonder that many new growers are surprised by just how much the local climate influences their setup. A polytunnel that would stand firm in southern Europe might struggle here without some thoughtful design choices and robust materials. That’s why understanding our weather patterns is not just helpful – it’s essential if you want to build a structure that will see you through many growing seasons to come.
Choosing the Right Materials for Longevity
When it comes to building a polytunnel that will truly stand the test of time in the unpredictable British weather, selecting the right materials is absolutely crucial. As anyone with a bit of experience on the allotment will tell you, not all frames and covers are created equal – some may look the part in summer, only to let you down when winter gales or a surprise frost roll in. Let’s have a good look at some of the most popular materials used for polytunnels here in the UK, weighing up their pros and cons so you can make an informed decision that suits your garden and your peace of mind.
| Material | Pros | Cons | Suitability for UK Climate |
|---|---|---|---|
| Galvanised Steel | Highly durable; resistant to rust and corrosion; strong against wind and heavy snow; long lifespan; low maintenance | Heavier and harder to assemble; more expensive upfront; can be difficult to modify once erected | Excellent – particularly robust for exposed sites or regions prone to harsh winters |
| Aluminium | Lightweight and easy to handle; won’t rust; modern appearance; recyclable | Less sturdy than steel in high winds; can bend under heavy snow; sometimes more expensive depending on grade | Good – suitable for sheltered gardens or smaller tunnels but may struggle in coastal areas with salty air or very windy conditions |
| UV-Resistant Polythene (Covering) | Affordable replacement compared to glass; flexible and easy to fit; designed to filter sunlight while reducing UV degradation | Needs replacing every 5-7 years; vulnerable to tears from sharp objects or strong winds if not secured properly; can become brittle over time | Very Good – provided you opt for high-quality, multi-layered UV-resistant film specifically rated for UK conditions |
A Bit of Wisdom: From decades mucking about in the garden, I’ve found that a sturdy galvanised steel frame paired with a thick, UV-resistant polythene cover strikes the best balance for most British gardeners. While aluminium has its place for those after something lighter, it’s well worth considering how exposed your plot is before deciding. And always invest in proper fixings – they might seem like small details now, but they’ll save you many headaches when that next big storm sweeps through.

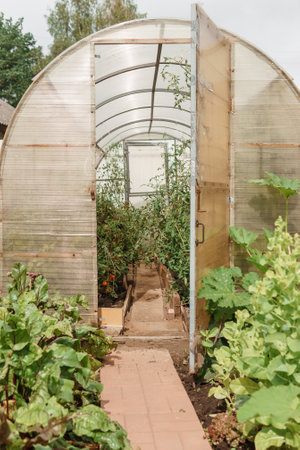
3. Essential Design Features for Resilience
When it comes to building a polytunnel that stands the test of British weather, there are a few time-honoured design features you simply can’t overlook. Let’s face it, our climate brings everything from blustery gales to relentless downpours, so resilience is the name of the game.
Reinforced Frames: The Backbone of Your Structure
If there’s one thing seasoned gardeners across the UK agree on, it’s that flimsy frames won’t cut it. Opt for galvanised steel or heavy-duty aluminium – these materials offer both strength and rust resistance, keeping your polytunnel standing proud year after year. Reinforced joints and thicker tubing provide extra stability, especially in exposed or coastal areas where wind can be particularly unforgiving.
Strong Anchoring Systems: Keeping Everything Grounded
No matter how robust your frame, it’s only as good as its anchorage. Traditional ground pegs might do for sheltered spots, but for most British gardens, screw anchors or deep-set concrete footings are well worth considering. These systems ensure your polytunnel doesn’t take off during a storm, saving you from those heart-stopping moments when the wind picks up unexpectedly.
Ventilation: Managing Moisture and Wind
It’s easy to focus solely on strength, but don’t forget about airflow. Proper ventilation isn’t just about keeping plants happy – it also helps your structure cope with the elements. Adjustable side vents and roll-up doors allow you to regulate humidity and temperature, while also reducing wind pressure inside the tunnel during storms. This thoughtful detail can make all the difference between a thriving crop and a soggy mess.
A Few Words from Experience
Having weathered more than a few fierce winters myself, I can assure you that investing in these key design features pays dividends in peace of mind. A well-built polytunnel not only shelters your plants but also gives you confidence, whatever the forecast throws your way.
4. Maintenance Tips for Year-Round Reliability
If you want your polytunnel to stand strong through the British drizzle, howling winds, and the odd frost, a bit of regular maintenance goes a long way. As any seasoned gardener will tell you, it’s not just about building it right – you need to look after it too. Here’s some practical advice, drawn from years of keeping both veg and tunnels in good nick across our unpredictable weather.
Regular Checks: Catch Problems Early
Set aside time each month to walk around your polytunnel and give it a proper inspection. Look out for loose fixings, small tears in the cover, or signs of wear on doors and vents. After a heavy storm or snowfall, make these checks more frequent. Spotting issues early means quick fixes rather than costly repairs down the line.
Cleaning: Keep It Clear and Bright
Moss, algae, and grime can quickly dull the light inside your polytunnel – and as we all know, every drop of sunlight counts here in Britain. Give the cover a gentle clean with soapy water twice a year: once in spring before planting kicks off, and again in autumn when things are winding down. Don’t forget to sweep paths and tidy up debris inside to prevent pests and diseases taking hold.
Maintenance Checklist
| Task | Recommended Frequency |
|---|---|
| Inspect frame & fixings | Monthly / After storms |
| Check cover for tears & holes | Monthly / After storms |
| Clean polythene cover | Twice yearly (Spring & Autumn) |
| Sweep paths & remove debris | Weekly |
| Lubricate door hinges & latches | Quarterly |
| Clear gutters & drainage channels | As needed (especially after leaf fall) |
Repairs: Don’t Delay Small Fixes
If you spot a tear or hole in your cover, patch it straight away with UV-resistant repair tape – don’t wait until it gets worse. Loose bolts should be tightened before windy weather sets in. If wooden frames start showing signs of rot, sand them back and treat with a suitable preservative. Keeping up with these little jobs means your polytunnel will last many more seasons.
Remember, as my old allotment neighbour always said: “A stitch in time saves nine.” By sticking to these simple routines, you’ll keep your polytunnel reliable through whatever the British climate throws at it.
5. Local Regulations and Community Advice
Before you break ground on your polytunnel project, it’s wise to brush up on local regulations and seek the counsel of seasoned British gardeners. In many areas across the UK, small garden structures like polytunnels typically fall under permitted development rights, especially if they are for personal use and don’t exceed certain size limits. However, rules can vary between councils, so it’s always prudent to check with your local planning authority. Some neighbourhoods or allotment sites may have their own guidelines regarding the height, location, or appearance of such structures.
Planning Permissions: What to Know
If your polytunnel is particularly large, close to a boundary, or within a conservation area, you might need planning permission. Generally speaking, if the structure is under 3 metres high (or 2.5 metres if near a boundary) and set well back from public roads, you’re unlikely to hit snags. Always err on the side of caution—better safe than sorry when it comes to council letters!
Neighbourly Best Practices
Beyond official rules, British gardening wisdom encourages keeping things neighbourly. Position your polytunnel so it doesn’t block anyone’s view or cast unwanted shadows on next door’s prize roses. A quick chat with neighbours before you start can prevent misunderstandings—and often garners helpful advice from those who’ve braved similar projects before.
Shared Wisdom from Experienced Gardeners
Long-standing members of allotment societies or local gardening clubs are invaluable sources of practical tips. Many recommend using muted colours for covers and opting for tidy construction to keep everything looking shipshape. Regular maintenance—tightening bolts after winter storms and keeping weeds at bay—also goes a long way in maintaining goodwill.
By taking the time to understand both formal regulations and informal community expectations, you’ll build not only a resilient polytunnel but also strong relationships with those around you—a hallmark of British gardening tradition.
6. Cost Considerations and Sources
When it comes to building resilient polytunnel structures suited for the British climate, keeping a close eye on your budget is as important as choosing the right materials. Start by setting a realistic budget that accounts for both initial setup and ongoing maintenance. Remember, investing a bit more upfront in quality materials often saves money in the long run by reducing repairs and replacements.
Budgeting Tips for Polytunnel Projects
Begin with a clear plan: measure your plot, decide on the tunnel size, and list essential features such as ventilation or reinforced doors. Prioritise durability over bells and whistles if funds are limited. Many seasoned growers suggest budgeting at least 10-15% extra for unexpected costs—weather in Britain can be unpredictable, after all.
Affordable Material Options
For frames, galvanised steel pipes remain a favourite for their sturdiness and rust resistance, though heavy-duty plastic tubing can be a frugal alternative for smaller structures. When it comes to covers, look for UV-stabilised polythene sheets; they’re designed to withstand our grey skies and occasional sunshine without degrading too quickly. Some gardeners also repurpose reclaimed timber or second-hand greenhouse panels to save costs while being eco-conscious.
Reliable UK Suppliers
The UK boasts a number of reputable suppliers catering specifically to polytunnel enthusiasts. Companies like First Tunnels, Premier Polytunnels, and Northern Polytunnels offer comprehensive kits and replacement parts tailored to the British climate. For those seeking bargains, local agricultural suppliers or even community gardening groups often have leads on discounted or surplus materials.
Ultimately, building a resilient polytunnel needn’t break the bank—by planning carefully, sourcing wisely, and opting for tried-and-true materials, you’ll create a sturdy haven for your crops that stands up to whatever the British weather has in store.