The Charm of British Spring Bulbs
When one thinks of a quintessential British spring, the image is often painted with vibrant daffodils nodding beneath ancient trees, carpets of bluebells stretching through woodland glades, and clusters of tulips brightening up village greens. Spring bulbs are not just plants; they are woven into the fabric of British gardening culture and seasonal celebration. Their arrival signals the end of winter’s gloom, bringing hope and renewal both to our outdoor spaces and, increasingly, to our homes. Whether it’s the tradition of planting snowdrops in churchyards or arranging hyacinths on a windowsill, bulbs offer an accessible way for everyone—from seasoned gardeners to city dwellers with modest balconies—to participate in the annual spectacle of spring. This article explores how container gardening with spring bulbs allows us to capture the essence of British springtime, embracing its horticultural heritage while making it possible to enjoy these cherished blooms indoors as well as out.
Choosing the Right Bulbs for British Containers
When it comes to container gardening with spring bulbs in the UK, selecting varieties that thrive in our unique climate is key. The right choice ensures a vibrant and resilient display, both indoors on a windowsill or out on the patio. Classic British favourites like snowdrops, daffodils, tulips, and bluebells are well-suited to containers and provide lasting cheer from late winter through spring.
Popular Spring Bulbs for UK Container Gardens
| Bulb | Flowering Period | Recommended Varieties | Notes for Containers |
|---|---|---|---|
| Snowdrops (Galanthus) | January–March | Magnet, S. Arnott | Plant densely for impact; prefers dappled shade |
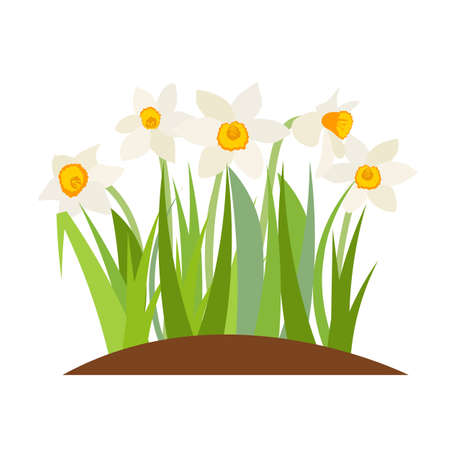
| Daffodils (Narcissus) | February–April | Tête-à-tête, Minnow, Jetfire | Dwarf types ideal for pots; reliable and low maintenance |
| Tulips (Tulipa) | March–May | Apricot Beauty, Queen of Night, Red Riding Hood | Select early or mid-season types; use deep pots for root growth |
| Bluebells (Hyacinthoides non-scripta) | April–May | Native English Bluebell | Semi-shade preferred; plant en masse for woodland effect |
Tips for Selecting Bulbs
- Choose firm, healthy bulbs: Avoid any that feel soft or show signs of mould.
- Select varied bloom times: Mixing early and late-flowering bulbs extends your display.
- Dwarf or compact varieties: These adapt best to the restricted space in containers.
- Check hardiness: Ensure your selections are hardy enough for outdoor UK conditions if placing containers outside.
Cultural Recommendations
For indoor displays, consider scented varieties such as miniature narcissi or species tulips for an added sensory delight. Outdoors, group different bulbs together in layers—a technique known as ‘lasagne planting’—to maximise colour succession and container impact. Always remember: good drainage is essential in British weather, so choose containers with adequate holes and use a free-draining compost mix.
3. Essential Containers and Compost for UK Conditions
Choosing the right container is a cornerstone of successful spring bulb gardening, especially when faced with the famously unpredictable British weather. Opt for pots crafted from frost-resistant materials such as high-fired terracotta, fibreclay, or robust plastic. These options are less likely to crack during sudden cold snaps—a frequent occurrence in UK springs. Ensure containers have adequate drainage holes; bulbs despise sitting in waterlogged compost, which can lead to rot even before shoots emerge.
Size and Placement Considerations
For spring bulbs, a container at least 20-25cm deep is ideal, allowing ample space for root development and insulation against temperature fluctuations. If your garden is exposed to strong winds or torrential rain, consider heavier pots to prevent them toppling over, or group lighter containers together for mutual shelter.
Sustainable Compost Choices
Traditional multi-purpose composts often contain peat, but given the UK’s ongoing movement towards sustainable gardening, seek out peat-free alternatives rich in organic matter. Peat-free composts made from coir, composted bark, or green waste are widely available and perform well with most spring bulbs. For added drainage—which is crucial—mix in horticultural grit or perlite at a ratio of about one part grit to three parts compost. This mirrors the free-draining soils that many bulbs naturally thrive in.
Soil pH and Nutrition
Most spring bulbs such as daffodils, tulips, and hyacinths favour neutral to slightly alkaline soils. If you’re unsure of your compost’s pH, test kits are inexpensive and widely stocked at British garden centres. A small handful of slow-release bulb fertiliser added during planting will encourage sturdy growth without overwhelming young roots.
Watering and Maintenance Advice
Remember that containers dry out faster than open ground—especially on windier patios or balconies. During dry spells, check compost moisture regularly but avoid waterlogging. Raise pots off the ground on pot feet or bricks to aid drainage through wet weather—a simple trick that can make all the difference in soggy British springs.
Planting Techniques: Timing and Layering for a Sequence of Blooms
If you’re hoping to recreate that classic British springtime display, both inside and out, it’s all about planting bulbs with care and foresight. The technique known as ‘lasagne planting’—layering bulbs at different depths in your containers—ensures a rolling parade of colour, just like the best cottage gardens or Chelsea Flower Show borders. Here’s a step-by-step guide to get the timing and layering right for both windowsills and patio pots.
Step-by-Step Lasagne Planting
- Choose Your Container: Select a pot with good drainage holes; terracotta or frost-proof ceramics are ideal for British weather.
- Add Drainage: Place a layer of crocks or gravel at the bottom to prevent waterlogging—a must in our often soggy springs.
- First Bulb Layer (Deepest): Place large, late-flowering bulbs such as tulips 20cm deep. Space them evenly but not touching.
- Add Compost: Cover with 5–7cm of peat-free multipurpose compost.
- Second Bulb Layer (Middle): Plant mid-season bloomers like daffodils or hyacinths 10–15cm above the first layer.
- Add More Compost: Another 5cm layer to separate the bulbs.
- Top Bulb Layer: Add early flowering bulbs such as crocus or dwarf iris about 5–8cm below the surface.
- Final Compost Layer: Fill up to just below the rim, firm gently, and water in well.
Timing for Continuous Colour
The key to seamless spring displays is strategic timing. Here’s a rough guide tailored for UK gardeners:
| Bulb Type | Sowing Depth | Flowering Time (UK) |
|---|---|---|
| Crocus/Dwarf Iris | 5–8cm below surface | February–March |
| Daffodils/Hyacinths | 10–15cm above base | March–April |
| Tulips | 20cm above base | April–May |
Tips for Indoors & Outdoors
- Windowsills: Use smaller containers and miniature bulb varieties. Keep in cool, bright spots until shoots emerge, then move to a warmer room for an earlier show.
- Outdoor Spaces: Choose sturdy pots and position in sheltered spots. In colder regions, consider wrapping pots with fleece during harsh frosts.
Straightforward Maintenance Advice
Avoid overwatering—British springs can be wet enough! Check compost moisture weekly, remove faded flowers promptly, and feed with a balanced liquid fertiliser once leaves appear. With this approach, you’ll enjoy a continuous sequence of blooms echoing the joy of spring across Britain—whether on your kitchen windowsill or by your back door.
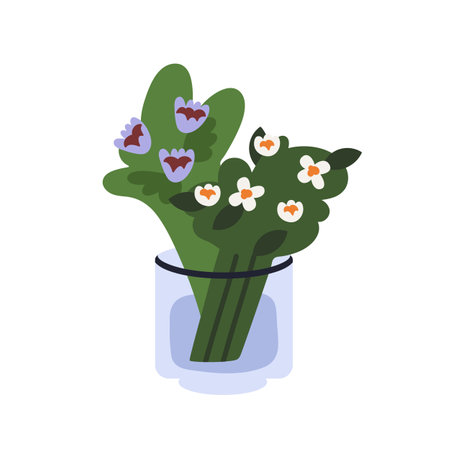
5. Indoor Displays: Bringing Spring into the British Home
Container gardening with spring bulbs isn’t just for patios or allotments—British homes, often defined by their cosiness and ever-changing weather, can also become vibrant showcases of seasonal renewal. With a bit of creativity, you can bring the charm of an English spring right into your sitting room or kitchen.
Choosing the Right Spot
Light levels in UK homes are famously varied, especially with our cloudy skies. For indoor bulb displays, opt for rooms with bright but indirect sunlight—think bay windows or conservatories. North-facing windowsills are perfect for bulbs like hyacinths and crocuses that prefer cooler temperatures and less direct light. If natural light is limited, try rotating your containers every few days to encourage even growth.
Creative Display Ideas
- Mismatched Teacups and Vintage Jugs: Embrace British nostalgia by planting small bulbs in teacups, mugs, or old enamelware. Cluster them on mantelpieces or bookshelves for a whimsical touch.
- Layered Bulb Baskets: Use shallow baskets lined with moss to plant several types of bulbs together. This “lasagne planting” technique staggers flowering times and adds ongoing interest throughout spring.
- Statement Centrepieces: Fill a large bowl or trough with narcissi and miniature tulips for a show-stopping dining table display—perfect for Sunday roast gatherings.
Adding a Seasonal Touch
Drape fairy lights among your containers or tuck in sprigs of willow or pussycat branches for a nod to classic British countryside style. A scattering of pebbles or shells collected from coastal walks can personalise your arrangements and evoke fond memories of British holidays.
Practical Tips for Lasting Cheer
Keep containers away from radiators, as bulbs dislike dry heat. Mist the soil lightly if central heating makes your home very dry. As blooms fade, move the containers outside to let the bulbs recharge naturally—ready for another round next year. With these simple ideas, you’ll find that spring isn’t just outdoors; it flourishes right at the heart of your British home.
6. Caring for Bulb Containers Through British Spring
Once your spring bulbs are happily nestled in their containers, ongoing care is essential to guarantee a vibrant display through the unpredictable British spring. The unique climate—from sudden April showers to late frosts—calls for a routine that’s both responsive and preventative, ensuring your efforts yield lush growth year after year.
Watering: Finding the Right Balance
British spring weather can be notoriously fickle. While it’s tempting to let rainfall do all the work, container-grown bulbs often dry out faster than those in garden beds. Check the compost regularly; if the top inch feels dry, it’s time to water. Use rainwater whenever possible—a nod to sustainability and to avoid limescale build-up from hard tap water. Be mindful not to overwater, as soggy compost encourages rot and fungal issues.
Feeding for Vigorous Growth
Bulbs are hungry after their winter rest. Once shoots appear, start feeding every fortnight with a balanced liquid fertiliser high in potash (like a tomato feed). This supports strong stems and long-lasting blooms. Cease feeding once flowering finishes, allowing foliage to die back naturally and store energy for next season’s growth.
Shielding Against Late Frosts
Even as daffodils and tulips begin to bloom, late frosts can strike unexpectedly across the UK. On chilly nights, move containers close to the house or into a sheltered spot. For larger pots that can’t be relocated easily, drape horticultural fleece or newspaper over emerging shoots and buds. This simple step prevents frost damage and keeps displays looking pristine.
Pest Prevention Strategies
Slugs, snails, and squirrels are notorious for targeting bulb containers in spring. Place copper tape around pot rims to deter slugs and snails, or use wildlife-friendly slug pellets sparingly. If squirrels are persistent, consider topping containers with a layer of gravel or mesh until foliage is established—this makes digging far less appealing.
Annual Maintenance for Continued Success
At the end of the season, remove faded flowers promptly to prevent seed formation—this helps bulbs conserve energy. Allow leaves to yellow and wither naturally before cutting them back. Every few years, refresh your containers by dividing overcrowded bulbs or replacing tired compost. With this tailored routine, your spring bulb containers will deliver reliable colour and cheer, whatever the quirks of a British spring.
7. From Flowering to Storage: Next Steps for Future Blooms
Once your spring bulbs have finished their glorious display, the real work of ensuring future blooms begins. Traditional British gardening wisdom emphasises thoughtful aftercare—this is what sets up your containers for years of reliable beauty. Start by deadheading spent flowers promptly. Snip off faded blooms with sharp secateurs, taking care not to remove the foliage. The leaves are crucial; they continue to photosynthesise and feed the bulb for next year’s growth, so let them yellow and die back naturally before tidying up.
Dealing with Spent Bulbs
If you’ve planted your bulbs densely in containers, you may wish to lift them once the foliage has died down. Gently ease them out with a hand fork, shake off excess compost, and inspect each bulb for signs of disease or damage. In line with British best practice, only healthy bulbs should be stored—dispose of any that are soft or mouldy.
Bulb Storage Techniques
Lay the bulbs out to dry in a cool, airy shed or garage for a week or two. Once thoroughly dry, store them in paper bags or mesh trays in a well-ventilated, frost-free spot. Labelling is vital; note down the variety and date so you can plan next season’s container schemes with confidence. Avoid plastic bags, as these trap moisture and encourage rot.
Preparing Containers for the Next Season
With bulbs lifted, take this opportunity to refresh your container compost—most UK gardeners will discard tired compost onto the borders or compost heap and scrub pots clean with hot water and a dash of garden disinfectant. This reduces the risk of pests and diseases carrying over to next year’s planting. If you leave bulbs in situ (as is often done with daffodils or hyacinths), simply top-dress containers with fresh compost and a little slow-release fertiliser in autumn.
By following these time-honoured steps, you ensure your spring bulb containers remain a highlight of the British gardening year—indoors or out—for many seasons to come.
